


3D PVC Wall Panel Installation Tutorial: Choose from Two Mounting Methods—Double-Sided Tape or Nail-Free Adhesive—and Do It Yourself!
3d Pvc Wall Panel Installation Tutorial: Choose from Two Mounting Methods—Double-Sided Tape or Nail-Free Adhesive—and Do It Yourself!
Want to instantly give your walls a 3D look without hiring a professional installation team? Now you can do it yourself! We're officially releasing a 3D PVC wall panel installation tutorial, requiring only two core tools: glue and double-sided tape. No complicated framing or special tools are needed. Just follow the steps, and a stylish feature wall can be completed in an afternoon.
Traditional wall panel installation often requires priming, nailing, and applying structural adhesive, demanding high-quality wall surfaces and making removal difficult. In contrast, 3D PVC wall panels are lightweight and have moderate hardness. When used with high-adhesion double-sided tape or environmentally friendly nail-free adhesive (or PVC-specific glue), they can be firmly adhered to smooth wall surfaces (such as latex-painted walls, tiled surfaces, glass, and Wood Panels). This method not only saves time and effort but also causes minimal damage to the existing wall surface and facilitates future replacement.
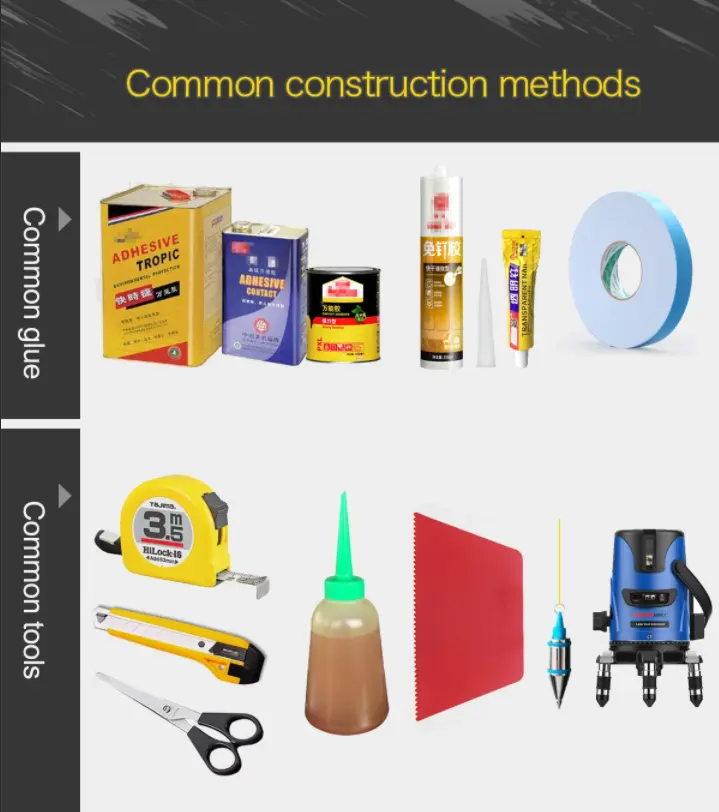
Tools and Materials Required:3D PVC wall panels /Strong double-sided tape /Environmentally friendly nail-free adhesive /Measuring tape/ pencil/ utility knife/ right-angle ruler/ Level/ Clean cloth, alcohol
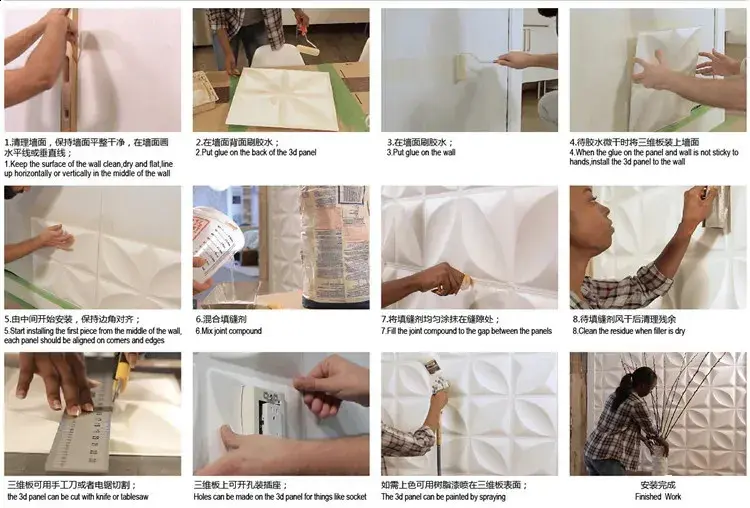
Step 1: Wall Preparation
Wipe the wall surface clean of dust and grease using a cloth. If the wall has any protrusions or peeling areas, these must be scraped smooth and patched beforehand. Ensure the wall is dry, level, and free of loose dust—this is the critical factor in ensuring the double-sided tape adheres securely. If necessary, wipe the intended application area with alcohol.
Step 2: Pre-layout and Cutting
Arrange the 3D PVC wall panels on the floor or a clean surface according to the intended design pattern. Use a tape measure to determine the dimensions of the wall area, then mark the cutting lines on the back of the panels using a pencil. Using a utility knife and a right-angle ruler, score the panel multiple times along the marked line (since the PVC material is thin, it can be snapped apart after repeated scoring). For irregular corners or edges, create a cardboard template first, and then use it to cut the panel.
Step 3: Use double-sided tape or nail-free adhesive to attach it
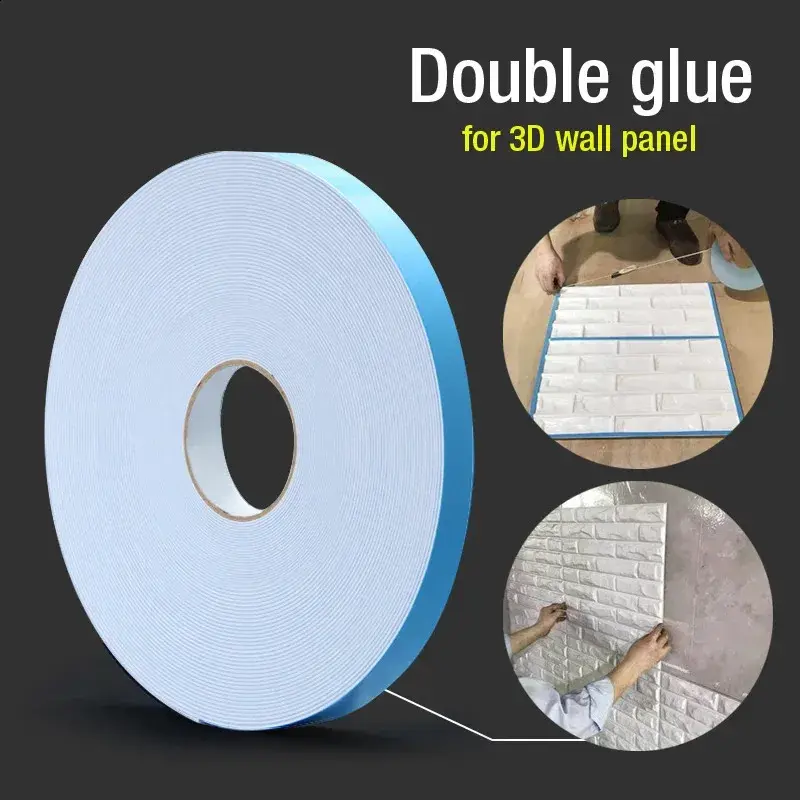
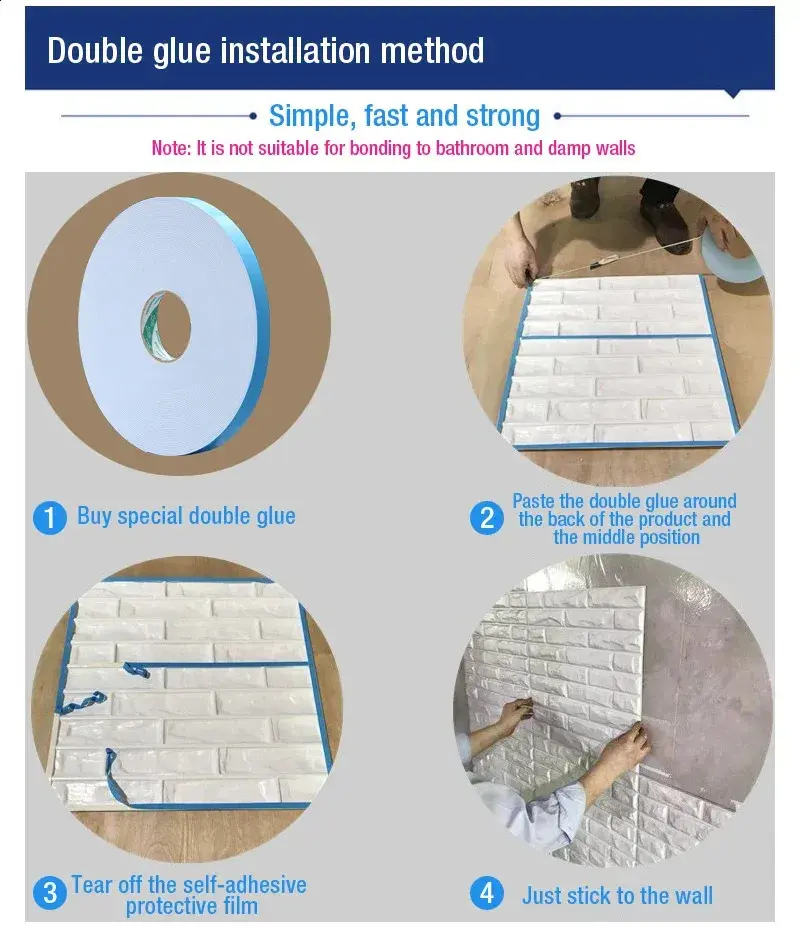
(1) Double-Sided Tape Installation and Usage Steps:
Apply a ring of double-sided tape around the edges of the back of the wall panel, then attach the panel in the center according to the product's shape. Note: Do not apply the double-sided tape too close to the edges to avoid it being visible after installation. Peel off the release paper from the double-sided tape, align the wall panel with the marked lines on the wall, and attach it in one go (do not peel and re-attach repeatedly). Press firmly evenly from the center outwards.
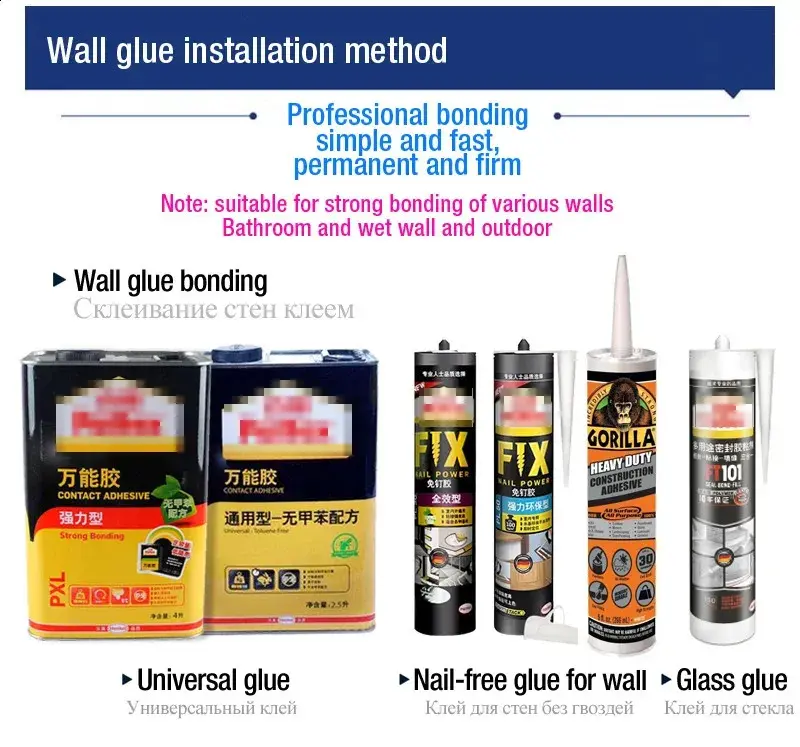
(2)No-nail adhesive installation steps
Apply adhesive to the back of the wall panel, leaving a 1-2cm gap from the edge to avoid overflow. The corners and edges can be reinforced with adhesive. Place the wall panel onto the wall along the marked lines, gently pressing to ensure initial adhesive contact. After pasting, use a support to press and secure the panel, then allow it to dry completely.
Both of the aforementioned methods have been tested in practice: the double-sided tape method is suitable for small areas, smooth wall surfaces, and applications requiring quick installation and immediate use; the nail-free adhesive method is suitable for larger areas, permanent mounting, and slightly uneven walls. You may choose either option based on your specific wall conditions and requirements.